21 Automate new template creation with {charpente}

FIGURE 21.1: The {charpente} package.
21.1 Motivations
Translating an HTML template into an R API requires the creation of a package. This is not a good practice to proceed as follows:
ui <- fluidPage(
  useShinydashboard(),
  tags$script(
    "$(function() {
      // JS logic
    });
    "
  ),
  # R UI elements
)

server <- function(input, output, session) {

  # R server logic
}

shinyApp(ui, server)
Imagine if we had to repeat the process for more than twenty components. The R package structure provides many advantages like:
- Develop a comprehensive documentation of the underlying API.
- Design unit tests to guaranty code robustness and improve long term plan.
- Relevant file organization, easing collaboration.
21.2 General idea
{charpente} is a game changer for custom template creation and has been widely used to help developing RinteRface packages. charpente (Granjon and Coene 2021) drastically:
- Eases the import of external dependencies.
- Speeds up the HTML to R conversion, which is quite frankly a rather boring process,
allowing the focus to be on the features rather than the syntax. This feature builds on top of the
{html2R}Shiny app by Alan Dipert, already mentioned in Chapter 2. - Eases JS code management, leveraging esbuild.
Let’s try below with html_2_R():
#> #> ── Converting code ... ──#> #> ✓ Code converted with success.#> ℹ Copy and paste the following R code#> ──────────────────────────────────────────────────#> tags$div(
#> class = "divclass",
#> id = "someid"
#> )html_2_R has a prefix parameter, which adds a tags$ prefix if TRUE. It is
TRUE by default which prevents errors with non exported Shiny tags like nav, as discussed in 2.
The second main benefit of charpente is the dependency management system. We explain the main principles in the below example.
21.3 A case study: {shinybulma}
In the following, we’ll illustrate charpente’s workflow, through a case study involving Bulma, a more and more popular open source CSS framework for the web. Importantly, there isn’t any JavaScript in the Bulma core code. We’ll see later that the recent bulma JS provides such an implementation. For now, we only focus on HTML and CSS.
To initialize a charpente package, we run:
path <- file.path(tempdir(), "mypkg")
create_charpente(path, license = "mit")
This sets up a minimal viable package under version control (git) and optionally GitHub remote setup, Figure 21.2.

FIGURE 21.2: Package structure for {charpente}.
By default, the package DESCRIPTION Imports field has shiny, htmltools and
utils. charpente is never required to be a dependency of your package since it might
be invasive.
In the ./R folder, charpente creates a mypkg-utils.R script containing:
- Tools to facilitate HTML dependency management like
add_dependencies(see corresponding section below). - Some validation functions mentioned in Chapter 20.
Finally, you may see some exotic folders and files like srcjs, package.json, package-lock.json and node_modules. Fear not, we describe them later in section 21.3.6. Overall, they are here to support to JS code management.
21.3.1 Build the HTML dependency
The interested reader may have a look at the Getting started guide, so as to know more aabout how to get Bulma. In short, to install Bulma dependencies, there are several ways:
- The content delivery network method (CDN), which consists of getting dependencies from a dedicated server. Files are not stored locally, which may be a problem if someone does not have internet.
- The local method consists of downloading the production files (minified CSS).
- Using npm (JS package repository but far less controlled than CRAN), which installs Bulma sources as well as production files. It means you can modify sources at anytime, which is not recommended since it would be hard to maintain.
In our case, we show the two first methods, the third being out of the scope of this book.
As shown previously in Chapter 16, we could build the Bulma dependency as follows:
library(htmltools)
bulma_deps <- htmlDependency(
  name = ...,
  version = ...,
  src = c(href = ...),
  stylesheet = ...
)

add_bulma_deps <- function(tag) {
  tagList(..., bulma_deps)
}
but this already takes too much time. This is where charpente comes into play.
Specifically, the create_dependency() function automatically points to the specified dependency by just providing its name. This means you have to know what you are looking for. Best practice is to look at the jsdelivr website (charpente is built on top of jsdelivr) and find the correct repository, as shown Figure 21.3. create_dependency() will also create the add_<DEP_NAME>_deps function in a <DEP_NAME>--dependencies.R script and open it.
charpente_options(local = FALSE) allows you to fine-tune the behavior. If local is FALSE,
charpente points to the CDN without downloading any files. However, your end users will require
an internet connection to be able to access static assets required by the Shiny app.
Therefore, package developers should prefer the option local = TRUE to ensure dependencies are always accessible.
Extra parameters like tag control the downloaded version since HTML templates
may have several flavors. It is always good to be able to test multiple versions and select
the best option.
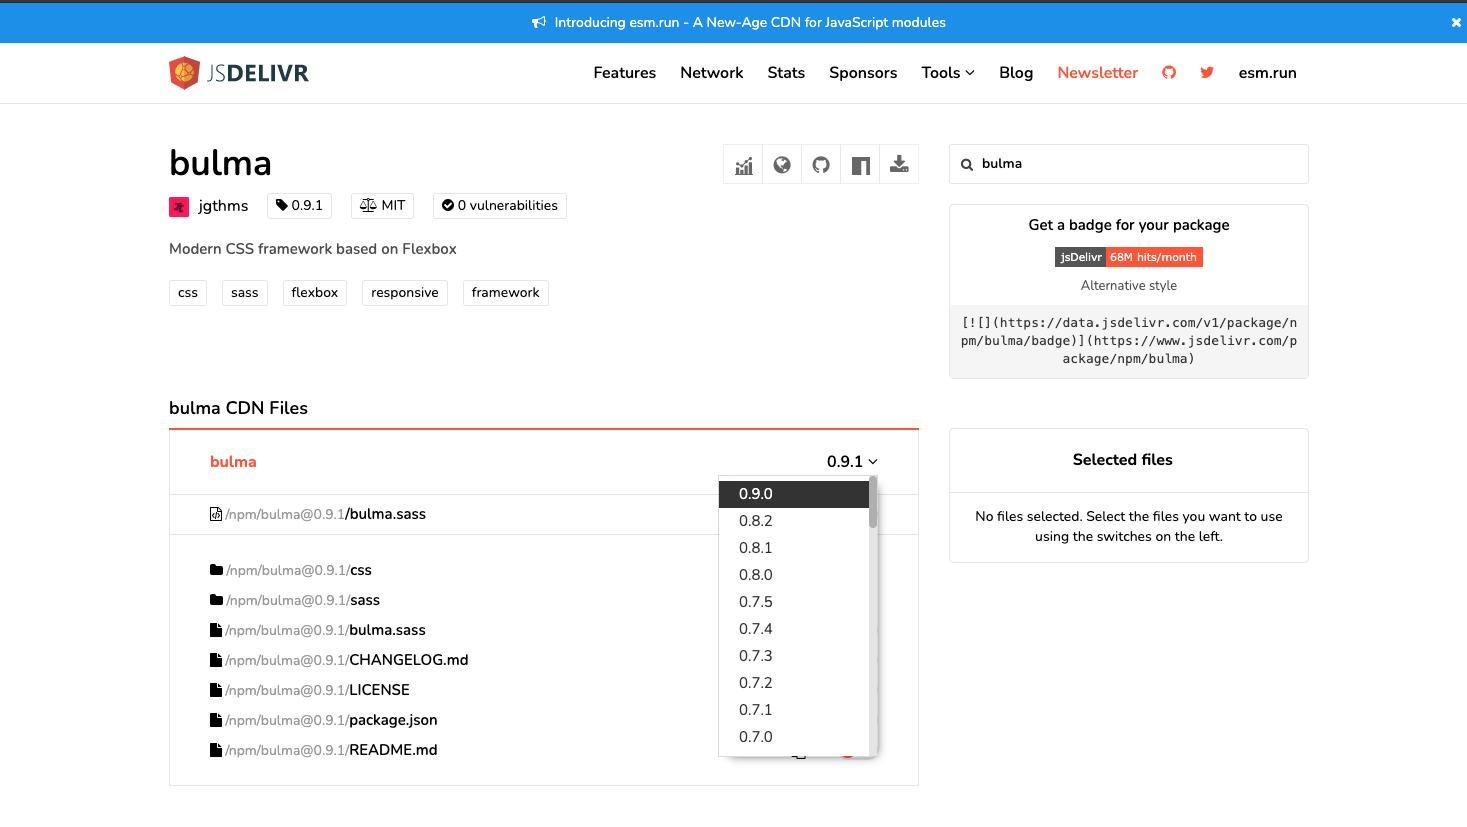
FIGURE 21.3: jsdelivr result for Bulma.
Once satisfied, we simply run the below code to get the latest version, or a specific version if tag is used:
# CDN method
create_dependency(
  "bulma",
  options = charpente_options(local = FALSE)
)
create_dependency(
  "bulma",
  tag = "0.7.0",
  options = charpente_options(local = FALSE)
)

# local method (default)
create_dependency("bulma")
Moreover, create_dependency() is able to filter all files, through the charpente_options():
-
minified targets all files with
.min, if TRUE. -
bundle targets all files containing
.bundle, if TRUE. -
lite targets files with
litekeyword, if TRUE. -
rtl target all files with
.rtl, if TRUE. rtl design stands for right to left and is common in some countries, for instance.
You may imagine that charpente_options() targets .min files by default. If you don’t find
any script, you probably have to change options. For instance, some templates
like Bootstrap and Framework7 have bundle.min files (charpente_options(bunlde = TRUE)), whereas Bulma doesn’t.
We can test our new dependency:
devtools::load_all()
findDependencies(add_bulma_deps(div()))
which works like a charm. If you chose the local option, you also get an inst/bulma-<BULMA-VERSION> folder
with all relevant files sorted by type. The bulma-dependencies.R script contains the
newly created add_bulma_deps function, either pointing to the CDN or the local
files, depending on the chosen strategy:
# local dependency script output

#' bulma dependencies utils
#'
#' @description This function attaches bulma dependencies
#' to the given tag
#'
#' @param tag Element to attach the dependencies.
#'
#' @importFrom htmltools tagList htmlDependency
#' @export
add_bulma_deps <- function(tag) {
 bulma_deps <- htmlDependency(
  name = "bulma",
  version = "0.9.3",
  src = c(file = "bulma-0.9.3"),
  stylesheet = "css/bulma.min.css",
  package = "mypkg",
 )
 tagList(tag, bulma_deps)
}
# CDN dependencies

#' bulma dependencies utils
#'
#' @description This function attaches bulma
#' dependencies to the given tag
#'
#' @param tag Element to attach the dependencies.
#'
#' @importFrom htmltools tagList htmlDependency
#' @export
add_bulma_deps <- function(tag) {
 bulma_deps <- htmlDependency(
  name = "bulma",
  version = "0.9.3",
  src = c(href = "https://cdn.jsdelivr.net/npm/bulma@0.9.3/"),
  stylesheet = "css/bulma.min.css"
 )
 tagList(tag, bulma_deps)
}
charpente sets the roxygen skeleton so that you don’t have to worry about function imports.
21.3.2 Set up the minimal page template
According to the Bulma documentation, the starter page template is:
<!DOCTYPE html>
<html>
  <head>
    <meta charset="utf-8">
    <meta name="viewport" content="width=device-width,
      initial-scale=1">
    <title>Hello Bulma!</title>
    <link rel="stylesheet" href="https://cdn.jsdelivr.net/
    /bulma.min.css">
  </head>
  <body>
    <section class="section">
      <div class="container">
        <h1 class="title">
          Hello World
        </h1>
        <p class="subtitle">
          My first website with <strong>Bulma</strong>!
        </p>
      </div>
    </section>
  </body>
</html>
Adding some charpente magic with html_2_R(), we set the path parameter to /html to get the entire template. We, replace ... with the appropriate content (see above). Since the copied HTML contains double quotations marks like <p class="subtitle"></p>, we put the string in single quotation marks.
# bulma_html_skeleton is the above HTML code
html_2_R(bulma_html_skeleton, path = "/html")
#> #> ── Converting code ... ──#> #> ✓ Code converted with success.#> ℹ Copy and paste the following R code#> ──────────────────────────────────────────────────#> tags$html(
#> tags$head(
#> tags$meta(charset = "utf-8"),
#> tags$meta(
#> name = "viewport",
#> content = "width=device-width, initial-scale=1"
#> ),
#> tags$title("Hello Bulma!")
#> ),
#> tags$body(tags$section(
#> class = "section",
#> tags$div(
#> class = "container",
#> tags$h1(
#> class = "title",
#> "Hello World"
#> ),
#> tags$p(
#> class = "subtitle",
#> "My first website with",
#> tags$strong("Bulma"),
#> "!"
#> )
#> )
#> ))
#> )At run time, Shiny adds html around the UI, thereby making it not necessary to include.
We don’t need the link(rel = "stylesheet", href = "https://cdn.jsdelivr.net/npm/bulma@0.9.3/css/bulma.min.css")
since add_bulma_deps does already attach the dependencies to the page. We removed tags$section content, as it may correspond to another Bulma component, like bulma_section().
The prefix parameter defaults to TRUE, so that we don’t have to worry about whether tags functions are exported
by Shiny (see Chapter 2).
The bulma_page() function is defined below, considering a simplified version of the above HTML to R translation, which we save in the ./R package folder:
bulma_page <- function(..., title = NULL) {
  tagList(
    tags$head(
      tags$meta(charset = "utf-8"),
      tags$meta(
        name = "viewport",
        content = "width=device-width, initial-scale=1"
      ),
      tags$title(title)
    ),
    add_bulma_deps(tags$body(...))
  )
}
With some practice, going from step one to the Bulma page templates literally takes three minutes, while it would have taken much more time by hand. At any time, you may replace the dependency with another version. Be careful, since charpente does not make snapshots of old versions.
21.3.3 Exercise: add bulmaJS
As stated in the above, Bulma only contains CSS code. It means we need to either develop custom JS code to add interactivity or rely on any third-party existing API. bulma JS is one of these.
This example has been written and tested with bulmaJS (https://www.jsdelivr.com/package/npm/@vizuaalog/bulmajs?version=0.12.1) 0.12.1.
Some features may change in future releases.
- Using charpente, create a Bulma js dependency. We point to vizuaalog/bulmajs since some bulmajs already exist and is not what we want. Run the following code in the R console.
get_dependency_assets("@vizuaalog/bulmajs")#> ℹ Trying with https://data.jsdelivr.com/v1/package/npm/@vizuaalog/bulmajs#> ✓ Success!#> ──────────────────────────────────────────────────#> $url
#> [1] "https://cdn.jsdelivr.net/npm/@vizuaalog/bulmajs@0.12.1/dist/"
#>
#> $files
#> name
#> 1 alert.js
#> 2 bulma.js
#> 3 dropdown.js
#> 4 file.js
#> 5 message.js
#> 6 modal.js
#> 7 navbar.js
#> 8 notification.js
#> 9 panel.js
#> 10 panelTabs.js
#> 11 tabs.js
#> hash
#> 1 0Tq89d1U9WqE3xunn1SJLwD3qQvoiDU/ujdOQAxNGME=
#> 2 vbERfMn7TdJ3ZyBfxd+sGJf/fWG/GnWmvMn88FdhfAE=
#> 3 a4jYH26F8++608JkISGhK0djf4oBOfa+MeKGzi0yM3U=
#> 4 auA7tFsecFictV+ZLehk+avAsr6QHjDvxXXGEyq2bbw=
#> 5 xIxQKW6ezuEuLxsEGB+voTYg0ZWjIldWZoZltlJIUjA=
#> 6 hBvcaTjLTgUEz5N2JhIeJz2jXagbOVG7KNxn406heMI=
#> 7 kZ1bvDA2eaAtPwCmyZJyQDlhmhXVXGmJot30R6iEXDY=
#> 8 DLFq8emqUPpFOt948fP+iWl1/SdJdYRiFA1yLEeowpw=
#> 9 NSnEBEPnog3obqVUCnTAn4d9+333/jvQpQsNlYDoYUk=
#> 10 YYhbFo+xIExSfq9YIa/gDkKunSv852A+Lay4qbP6/+w=
#> 11 /DBuPkvCsQJ6pg+nqBqwFsOHXphtW12e2TQmIs9+tNU=
#>
#> $hasSubfolders
#> [1] FALSEAs shown in the code output, bulmajs does not have minified JS and CSS files. Therefore, to install the dependency, we have to specify the charpente_options(minified = FALSE):
opts <- charpente_options(minified = FALSE)
create_dependency(..., options = opts)
Notice how many files are added to the dependency. Below, we only work with notifications:
- Only keep
notification.jsand remove all the unnecessary files - Only keep
bulma.jsthat gather all plugins in one script.
The best practice is usually to keep only what we need since some scripts may be heavy to load.
- Run
devtools::load_all(). Modify the below code to test the newly created dependency. Hint: toggle the HTML inspector to check all appropriate dependencies are there.
# Where should the html dependency be added?
ui <- bulma_page()
server <- function(input, output, session) {}
shinyApp(ui, server)
21.3.4 Add custom JS
Notifications are always useful to send user feedback. Shiny has a notification system through shiny::showNotification. Like Shiny, Bulma notifications are entirely built from JS (no need for any HTML code).
The API works as follows:
-
Bulma(target).notification(config)creates the notification based on a JSON option list (config).targetexpects a jQuery selector. -
showtoggles the newly instantiated notification
In other words the following code attaches the notification to the body:
Bulma('body').notification({
  body: 'Example notification',
  color: 'info'
}).show();
In the following, we design the R interface and JS handler (which is no more than an event listener).
charpente has a function that creates both pieces, namely create_custom_handler():
create_custom_handler("notification")We obtain the notification-handler.R script:
send_notification_message <- function(
  id = NULL,
  options = NULL,
  session = shiny::getDefaultReactiveDomain()
) {
 message <- list(
  # your logic
 )

 session$sendCustomMessage(type = "notification", message)
}
and the corresponding JavaScript piece in notification.js,
derived from the golem::add_js_handler function:
$(function() {
  Shiny.addCustomMessageHandler(
    'notification', function(message) {

  });
});
By default, the JS file is created in the ./srcjs directory. This is a special directory where we store all JavaScript files that depend on the package author. For instance, bulmaJS is an external dependency and is very unlikely to be edited by the package author. For that reason, it remains in the ./inst folder like all other external dependencies.
21.3.5 Add custom input/output bindings
In section 12.2, we created better shinydashboard boxes that one
may programmatically collapse, close, and restore. Until now, there was no way to
setup an input binding skeleton and you had to copy and paste the same code each time. charpente has a create_input_binding() and create_output_binding() (functions that
you can also find in the development version of golem). Contrary to the custom handler case,
create_input_binding() only generates the JavaScript piece since the R part is highly variable from
one input to another. To get a plug-and-play box input binding, we call:
create_input_binding("boxBinding")which gives the input-boxBinding.js script in the ./srcjs folder:
var boxBinding = new Shiny.InputBinding();
$.extend(boxBinding, {
  find: function(scope) {
    // JS logic $(scope).find('whatever')
  },
  getValue: function(el) {
    // JS code to get value
  },
  setValue: function(el, value) {
    // JS code to set value
  },
  receiveMessage: function(el, data) {
    // this.setValue(el, data);
  },
  subscribe: function(el, callback) {
    $(el).on('click.boxBinding', function(e) {
      callback();
    });

  },
  unsubscribe: function(el) {
    $(el).off('.boxBinding');
  }
});
Shiny.inputBindings.register(boxBinding, 'shiny.whatever');
This function has multiple options:
-
initialized is FALSE by default. If TRUE, it adds an
initializedmethod to the binding. -
dev adds some
console.logelements whenever relevant to help in the debugging process. -
event is a list containing events related to the binding. By default, it generates
a
clickevent without any rate policy. To add extra events we dolist(name = c("click", "whatever"), rate_policy = c(FALSE, TRUE)).
Similarly, the create_output_binding() function creates a ready to use output binding JS script,
in the ./srcjs folder (create_output_binding("menuOutput")):
var menuOutput = new Shiny.OutputBinding();
$.extend(menuOutput, {
  find: function(scope) {
    // JS logic $(scope).find('whatever')
  },
  renderValue: function(el, data) {
    // JS logic
  }
});
Shiny.outputBindings.register(menuOutput, 'shiny.whatever');
21.3.6 Organize your JS code
This naturally leads us to this part, which is about JS code organization. Shiny developers
may have a lot of custom JS scripts, and it is generally a bad idea to put them all
under ./inst. Instead, we store them in ./srcjs, as already stated above. charpente has a function providing
a tool to bundle the JS code for production or development, that is build_js():
- It compresses, mangles all JS files and concatenate them in one minified file called
mypkg.min.js. If mode isdev, the files are not minified. - In production mode (mode is
prod, by default), it additionally generates source maps.
esbuild concatenates files by the order provided in the ./srcjs/main.js entry point, automatically generated by create_charpente(). The configuration is provided by charpente in the package.json file.
The script mypkg.min.js is not human readable but the generated source map
allows us to reconstruct the original code, whose location is under the web browser ./srcjs folder, like all Shiny JS files. From there, we can access any mapped script and start the debugging process like setting break points.
In production, the variable names, functions, are mangled. For instance, a variable
config could be called t in the minified file.
Additionally, build_js() creates the mypkg-dependencies.R file containing the HTML
dependency pointing to the newly generated JS file (below for production):
#' mypkg dependencies utils
#'
#' @description This function attaches mypkg dependencies
#' to the given tag
#'
#' @param tag Element to attach the dependencies.
#'
#' @importFrom utils packageVersion
#' @importFrom htmltools tagList htmlDependency
#' @export
add_mypkg_deps <- function(tag) {
 mypkg_deps <- htmlDependency(
  name = "mypkg",
  version = packageVersion("mypkg"),
  src = c(file = "mypkg-0.0.0.9000"),
  script = "js/mypkg.min.js",
  package = "mypkg",
 )
 tagList(tag, mypkg_deps)
}
Switching between prod and dev automatically updates the mypkg-dependencies.R JS files.
Finally, under the hood, create_js(), create_input_binding(), create_output_binding() and create_custom_handler() add a reference to the newly created script in the main.js entry point, which may look like:
// Gather all files to import here
import './init.js'
import './widgets.js'
import './test.js'
A real-life example will be shown in the section 23.7 and the result showcased here.
export and import must be called from the top level of a script. For instance,
they cannot live inside the $( document ).ready(function(...)});, as this would trigger a build error.
charpente currently does not provide a similar process for CSS, as this is still work in progress. Other tools exist like {packer} by John Coene, which leverages webpack to handle JS code.
21.3.7 Combine multiple dependencies
add_dependencies() allows you to select any dependencies available in the ./R folder,
provided that they follow the convention <depName>_dependencies.R
(which is always the case if you use charpente).
For instance add_dependencies(div(), deps = c("bulma", "bulmajs")) adds Bulma (first) and
bulmajs dependencies to a div tag. You may change the order as you see fit, as most
of the time, the order matters. We update bulma_page() to benefit from the new dependencies:
bulma_page <- function(..., title = NULL) {
  tagList(
    tags$head(
      tags$meta(charset = "utf-8"),
      tags$meta(
        name = "viewport",
        content = "width=device-width, initial-scale=1"
      ),
      tags$title(title)
    ),
    add_dependencies(
      tags$body(...),
      deps = c("bulma", "mypkg")
    )
  )
}
As mentioned above, add_dependencies() belongs to the mypkg-utils.R script
so that you don’t have to import charpente in the DESCRIPTION Imports field.
21.3.8 Other {charpente} helpers
Let’s finish this section by listing other useful charpente tools.
We know create_dependency() to install an external dependency.
As shown earlier, this code installs Bulma dependencies:
create_dependency("bulma")However, we don’t necessarily know all package versions and may need
bulma 0.9.3 or bulma 0.7.0. get_dependency_versions() allows to look for
all existing versions:
get_dependency_versions("bulma")#> ℹ Trying with https://data.jsdelivr.com/v1/package/npm/bulma#> ✓ Success!#> ──────────────────────────────────────────────────#> [1] "0.9.3" "0.9.2" "0.9.1" "0.9.0" "0.8.2"
#> [6] "0.8.1" "0.8.0" "0.7.5" "0.7.4" "0.7.3"
#> [11] "0.7.2" "0.7.1" "0.7.0" "0.6.2" "0.6.1"
#> [16] "0.6.0" "0.5.3" "0.5.2" "0.5.1" "0.5.0"
#> [21] "0.4.4" "0.4.3" "0.4.2" "0.4.1" "0.4.0"
#> [26] "0.3.2" "0.3.1" "0.3.0" "0.2.3" "0.2.1"
#> [31] "0.2.0" "0.1.2" "0.1.1" "0.1.0" "0.0.28"
#> [36] "0.0.27" "0.0.26" "0.0.25" "0.0.24" "0.0.23"
#> [41] "0.0.22" "0.0.21" "0.0.20" "0.0.19" "0.0.18"
#> [46] "0.0.17" "0.0.16" "0.0.15" "0.0.14" "0.0.13"
#> [51] "0.0.12" "0.0.11" "0.0.10" "0.0.9" "0.0.8"
#> [56] "0.0.7" "0.0.6" "0.0.5" "0.0.4"
get_dependency_versions("bulma", latest = TRUE)#> ℹ Trying with https://data.jsdelivr.com/v1/package/npm/bulma#> ✓ Success!#> ──────────────────────────────────────────────────#> [1] "0.9.3"Specifying latest = TRUE ensures recovering the very last stable version
(it excludes alpha/beta versions).
You may explore also the dependency files with get_dependency_assets(), even for
a specific version with tag:
get_dependency_assets("bulma")#> ℹ Trying with https://data.jsdelivr.com/v1/package/npm/bulma#> ✓ Success!#> ──────────────────────────────────────────────────#> $url
#> [1] "https://cdn.jsdelivr.net/npm/bulma@0.9.3/"
#>
#> $files
#> name
#> 1 bulma.css
#> 2 bulma.css.map
#> 3 bulma.min.css
#> 4 bulma-rtl.css
#> 5 bulma-rtl.css.map
#> 6 bulma-rtl.min.css
#> hash
#> 1 QWzsjhiaNlONAp479EIeaY+tQvrt3v1iOYtBMVZ7RJc=
#> 2 039vv4Mje70ZS33gGww4tRQgCnEKI2C87RydZz8KHig=
#> 3 UDtbUHqpVVfXmdJcQVU/bfDEr9xldf3Dbd0ShD0Uf/Y=
#> 4 TUHS7Sxzy8yNpSvZw/kemcmvnax3Js9PHq1cPdo7i7U=
#> 5 jrQYx00fN25Pxm81v1gPZtcutWE2KvnijIX5nR/V9uc=
#> 6 LchhQrhf3t9LP/bBuIq1SvOWEIiX8bpgQedoeytbSV0=
#>
#> $hasSubfolders
#> [1] TRUEThis is helpful to further fine-tune charpente_options(), as stated previously. It is indeed possible
that you don’t want bundles, minified, lite or rtl versions of scripts. Internally, create_dependency()
relies on get_dependency_assets().
get_installed_dependency() allows you to inspect which dependencies are installed. It only works
if the dependencies were created locally, that is charpente_options(local = TRUE).
Finally, we may ask how to update a given dependency. update_dependency() does this, provided that
the dependency is installed locally. By default, it installs the latest version of the targeted dependency.
It gives a diagnosis comparing the current installed version
with the latest available version, yielding three possible cases. Dependencies are up to date
and update_dependency("bulma") yields:
#> ℹ Trying https://data.jsdelivr.com/v1/package/npm/bulma
#> ✓ Success!
#> ───────────────────────────────────────────────────────
#> Error in update_dependency("bulma") : Versions are identical
The installed dependencies are outdated (we have 0.7.0 with create_dependency("bulma", tag = "0.7.0", options = charpente_options(local = TRUE))), the function shows the targeted version as well as
the last one:
#> ℹ Trying https://data.jsdelivr.com/v1/package/npm/bulma
#> ✓ Success!
#> ───────────────────────────────────────────────────────
#> ℹ current version: 0.7.0 ||
#> target version: 0.9.3 ||
#> latest version: 0.9.3
#> ! Upgrading bulma to 0.9.3
#> ✓ Directory inst/bulma-0.9.3/css successfully created
#> ! Remove existing file R/bulma-dependencies.R
The last use case is a downgrade, which may be possible if the package maintainer realizes
that the dependency version is too unstable. In the following, we have bulma-0.9.3 installed
and downgrade to 0.7.0 with update_dependency("bulma", version_target = "0.7.0"):
#> ℹ Trying https://data.jsdelivr.com/v1/package/npm/bulma
#> ✓ Success!
#> ───────────────────────────────────────────────────────
#> ℹ current version: 0.9.3 ||
#> target version: 0.7.0 ||
#> latest version: 0.9.3
#> ! Downgrading bulma to 0.7.0
#> ✓ Directory inst/bulma-0.7.0/css successfully created
#> ! Remove existing file R/bulma-dependencies.R
21.4 Other tips
21.4.1 Validate JavaScript
We could not finish this chapter without mentioning tools to validate JavaScript code. JSHint, which comes with {jstools}. Below is an example of how to check all the shinyMobile JavaScript input bindings at once:
shinyMobileJS <- system.file(
  sprintf(
    "shinyMobile-%s/js/shinyMobile.js",
    packageVersion("shinyMobile")
  ),
  package = "shinyMobile"
)
# jstools print messages to the console
# We don't want to see them all in the book ...
invisible(capture.output(
  temp <- jshint_file(
    input = shinyMobileJS,
    options = jshint_options(
      jquery = TRUE,
      globals = list("Shiny", "app")
    )
  )
))

head(tibble::as_tibble(temp$errors[, c("line", "reason")]))
#> A tibble: 51 x 2
#>    line reason
#>   <int> <chr>
#>  1    33 'template literal syntax' is only available in ES6.
#>  2    37 'template literal syntax' is only available in ES6.
#>  3    41 'template literal syntax' is only available in ES6.
#>  4    42 'template literal syntax' is only available in ES6.
#>  5    52 'arrow function syntax (=>)' is only available in ES6.
#>  6    64 'arrow function syntax (=>)' is only available in ES6.
You may fine-tune the jshint_file behavior with the jshint_options. You will be often tempted to call eval in JS code, which will result in a JSHint error. An option called evil exists to disable the corresponding test. However, we recommend playing the game, accept those errors and try to fix them instead of cheating with options! An important remark about validation is that it does not check whether your code
does what it should do. It just focuses on checking whether the code could probably execute. To test
the JavaScript logic, please refer to section 20.2.2.2.
Be extremely careful: if we consider the example mentioned in section 10.6.2, the
following code is valid JavaScript:
const sendNotif = (message, type, duration) => {
  Shiny.notification.show({
    html: `<strong>${message}</strong>`,
    type: type,
    duration: duration
  });
};

sendNotif('Hello')
and will pass the validation step without any error:
jshint(
  "const sendNotif = (message, type, duration) => {
  Shiny.notification.show({
    html: `<strong>${message}</strong>`,
    type: type,
    duration: duration
  });
  };
  sendNotif('Hello');
  ",
  options = jshint_options(
    esversion = 6,
    jquery = TRUE,
    globals = list("Shiny", "app")
  )
)$errors
#> NULLYet the code won’t work since Shiny.notification does not exist.
21.4.2 Test JS code
charpente provides a starting point to test the JS code with test_js(), by leveraging the mocha library. All tests are assumed to be contained within the srcjs/test folder. Inside, we find test_basic.js, which was created upon package initialization, as a boilerplate:
describe('Basic test', () => {
  it('should not fail', (done) => {
    done();
  });
});
This test starts with a describe function, similar to the testthat context() function, where you provide the general idea behind the test. it is equivalent to test_that(), where we describe what specific feature is being tested. Inside, we write a series of instructions, some of them failing, others passing. Naturally, mocha works better with other assertions libraries like expect.js or should.js, whose details are out of the scope of this book.
21.4.3 Beautify JS code
If you work with the RStudio IDE, your JS code may sometimes be messy with bad indentation.
jstools also provides a function and addin to fix the problem. prettier_js(code) and
prettier_file(input = "path/to/file.js", output = "path/to/reformated.js") does this.
I often use the Prettier addin, which is way faster than typing the function call (Figure 21.4).
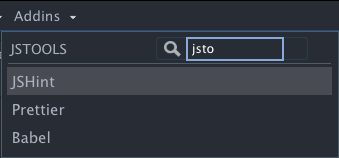
FIGURE 21.4: Better JS formatting.